
If you’ve been scrolling through Pinterest lately, chances are you’ve seen the jaw-dropping drifting car wall light that looks straight out of Fast & Furious.
With glowing flames trailing behind a toy car, this quirky decor hack has become a hot favorite for gamers, teens, and even adults who love cool DIY lighting.
The best part? You don’t need to spend big bucks.
With just a few materials, a little patience, and some creativity, you can recreate this viral DIY project at home.
Table of Contents
Materials & Tools You’ll Need
Before you dive in, gather everything in one place. Here’s what you’ll need:
- A toy car (sports car or Hot Wheels style works best)
- LED strip lights or battery-operated fairy lights
- Cotton or pillow stuffing (for the flame effect)
- Spray paint or acrylic paint (orange, yellow, red for flames)
- Strong adhesive or hot glue gun
- Wall mounting tape or small nails for fixing the car
- Scissors and a small brush for detailing
💡 Pro Tip: If you want the flames to glow in multiple shades, go for RGB LED strips that come with a remote control.
Preparation Before You Start
Like any DIY project, a little prep goes a long way.
First, pick the right wall spot—ideally behind a desk, gaming setup, or near a display shelf.
The darker the area, the more dramatic the lighting effect will be.
Make sure the wall surface is clean and dry before sticking anything.
If you’re using wires instead of battery lights, ensure you have a nearby socket.
⚠️ Safety Tip: Avoid placing the setup near curtains or flammable materials.
Step-by-Step Tutorial
Step 1: Preparing the Car
Choose a toy car that looks dynamic, preferably one with headlights. If you’re using an old toy, give it a quick paint touch-up for a fresh look.
Step 2: Building the Flame Base
Take the cotton or stuffing and gently pull it apart until it forms fluffy, cloud-like textures. This will be your flame base.
Step 3: Adding the Glow
Wrap or thread LED lights inside the cotton. Secure them with a little glue, but make sure the lights stay visible for maximum glow.
💡 Alternative Lighting Options: Instead of regular LED strips, you can also use USB-powered lights, rechargeable light sticks, or even smart bulbs to add customizable effects.
Step 4: Shaping the Flames
Stick the cotton-light combo on the wall in a curved “drift” shape.
Start wide and taper it towards the car to mimic motion. Spray paint the cotton with orange, red, and a hint of yellow for that fiery look.
Step 5: Mounting the Car
Now fix the toy car at the end of the trail using strong adhesive or wall tape. Position it slightly tilted to create a racing effect.
🔧 Detailed Wall-Mounting Methods: For better durability, you can also use small nails, screw hooks, or lightweight brackets instead of just adhesive.
Step 6: The Finishing Touches
Add small props like miniature racing flags, traffic cones, or even a painted road backdrop for extra realism.
Tips for Customizing Your Drifting Car Wall Light
- Use a blue flame effect for a futuristic vibe.
- Try different car models: sports cars, muscle cars, or even a Batmobile replica.
- Add neon stickers or glow-in-the-dark paint for a next-level gaming setup.
Common Mistakes to Avoid
- Using low-quality cotton that doesn’t hold shape.
- Overloading with paint, which can dim the LED glow.
- Weak adhesive that causes the car to fall off.
Budget & Time Breakdown
- Estimated cost: ₹700–₹1,200 ($10–$15) depending on materials.
- Time required: Around 1–2 hours for beginners.
💡 Insider Tip: Buy cotton and toy cars in bulk if you plan to make more. They make amazing gifts for gamer friends.
Variations for Different Room Types
- Kids’ Room: Use softer fairy lights and cartoon-style cars.
- Living Room: Go for a more subtle glow and neutral car colors.
- Office or Gaming Setup: Add RGB lights for a bold, high-tech vibe.
The Final Reveal
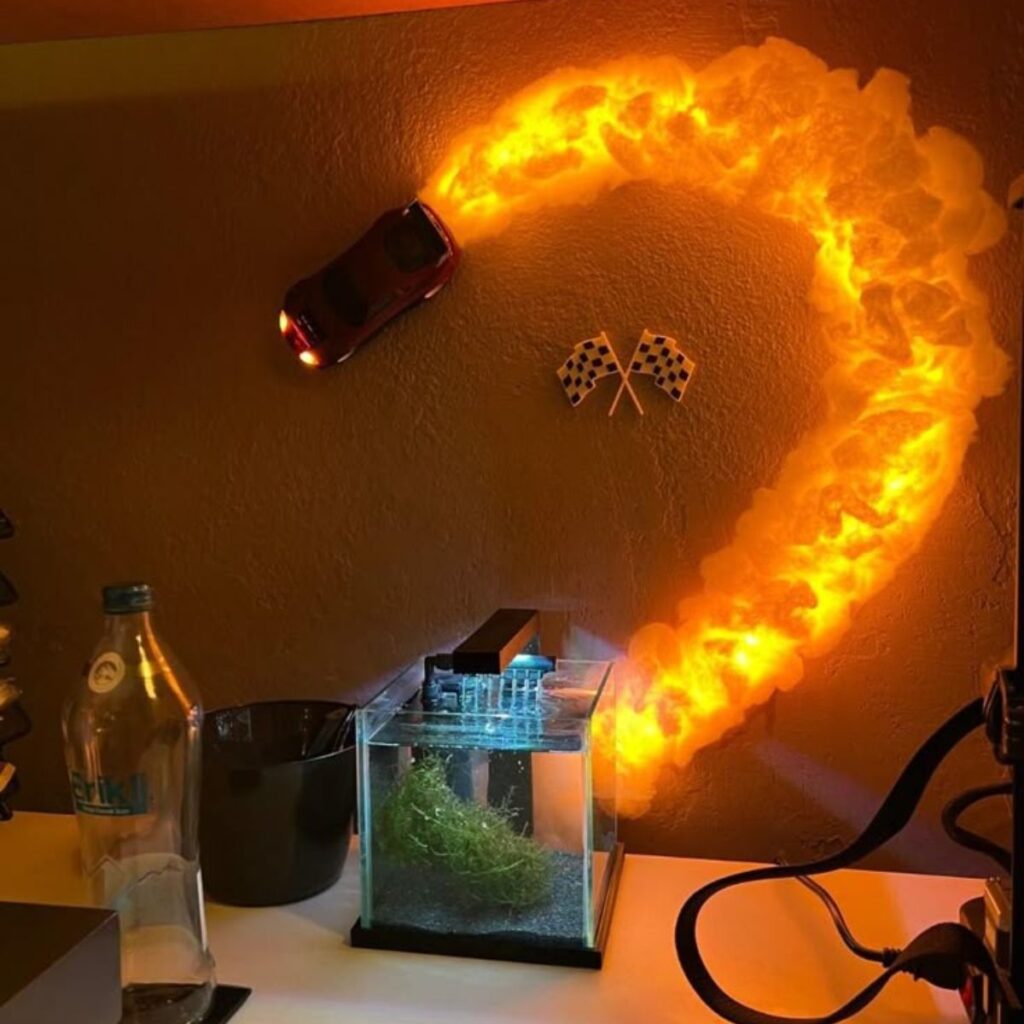
Once complete, turn off your room lights and power on your creation. The result? A stunning drift scene on your wall that looks like a car bursting through flames. Perfect for gaming rooms, teenagers’ bedrooms, or even as a unique conversation piece in your living space.
Don’t forget to snap photos and share them on Pinterest—this DIY hack is a guaranteed traffic magnet.
Troubleshooting Section
- Lights don’t stick properly: Reinforce with extra tape or clips.
- Cotton falls off: Use a stronger glue gun or add pins for support.
- Lights too dim: Replace with higher-brightness LED strips.
- Car won’t stay in place: Switch to nails, hooks, or wall brackets.
FAQs
Q. Can I use fairy lights instead of LED strips?
Yes, fairy lights work well if you want a softer glow.
Q. Is it safe for kids’ rooms?
Yes, as long as you use battery-operated lights and secure the setup firmly.
Q. How long does it last?
With proper care, your drifting car wall light can last for months.
Conclusion
This drifting car wall light DIY is more than just decor—it’s a personal statement for anyone who loves speed, gaming, or unique design. Affordable, creative, and eye-catching, it’s no wonder Pinterest can’t get enough of it.
So grab your tools, bring out your inner DIY racer, and light up your room in style!


One thought on “Step-by-Step DIY Tutorial for Making the Drifting Car Wall Light”